Jogando I Ching com Varetas

The first thing I have to say is that this method is beautiful, full of symbolism, traditions and is an excellent opportunity to concentrate throughout the consultation process.
I will mention several traditions, but following them is not mandatory. My only recommendation is not to change the rule adopted in the process in the middle of the question.
The first thing to do is to choose an appropriate place to start the consultation process. It is advisable to choose a quiet place with a spacious table.
LOCATION ideal para jogar I Ching com varetas
MATERIALS FOR THIS METHOD
- 50 Bamboo or Yarrow stalks
- a cloth used only for this purpose, being yellow on one side and black on the other
- incense with a pleasant aroma
- sheet of paper to write down the results
- pen or pencil
STARTING THE PROCESS
Place the cloth with the yellow and black side on the table.
The black side will represent the Yin side (which cares, protects and watches over) and the yellow side represents the Yang side (which creates, generates, or propitiates) of our existence.
The yellow side should be facing up, in contact with the yarrow stacks.
Separate the 50 stalks of Yarrow or Bamboo and purify them in the smoke of an incense. Concentrate on the moment - let's access the synchronicity.
From this group of stalks, separate one and place it in a horizontal position on top of the cloth.
STALKS 1
This stalck, which will remain in this position until the end of the process, represents the One that gave origin to the Yin-Yang Energies (opposite poles complementary to each other) or to an observer.
BEGINNING OF SYNCHRONICITY
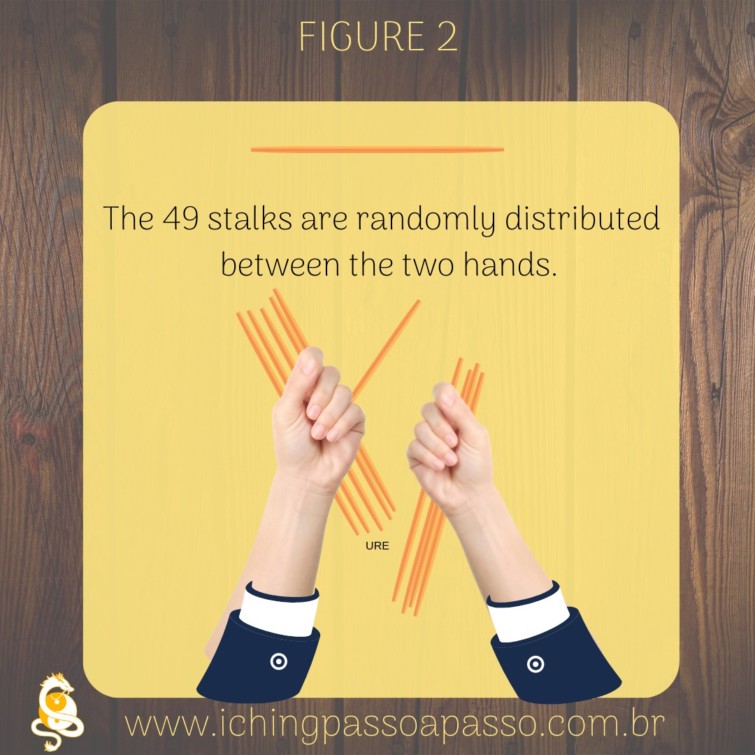
Now we will randomly divide the remaining 49 stalks into two groups.
The right hand group represents the Receptive Yin Energy (Earth) and the left hand group the Creative Yang Energy (Sky).
Take a stalk from your right hand and place it between your little finger and ring finger of your left hand.
STALKS 2
Leave the right hand stacks over the table.
STALKS 3
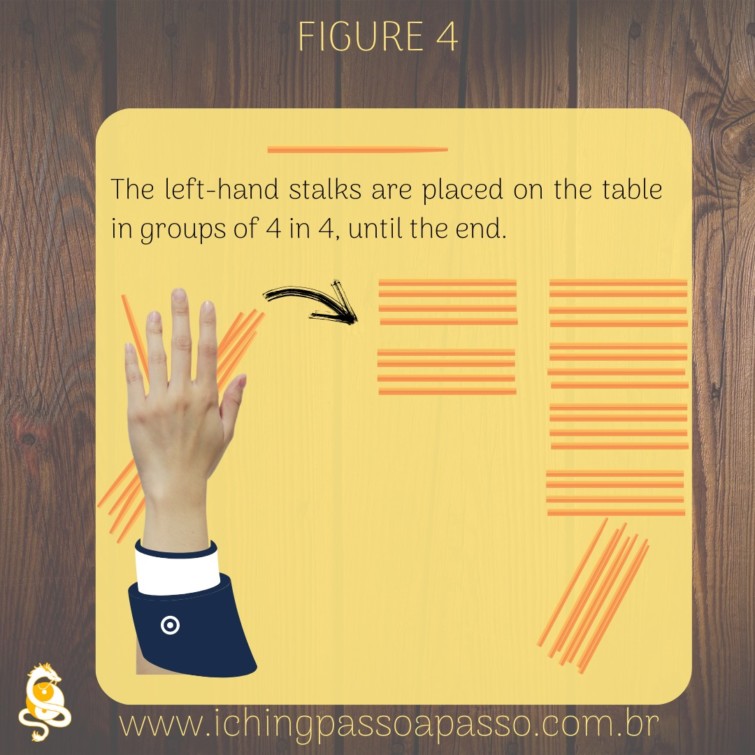
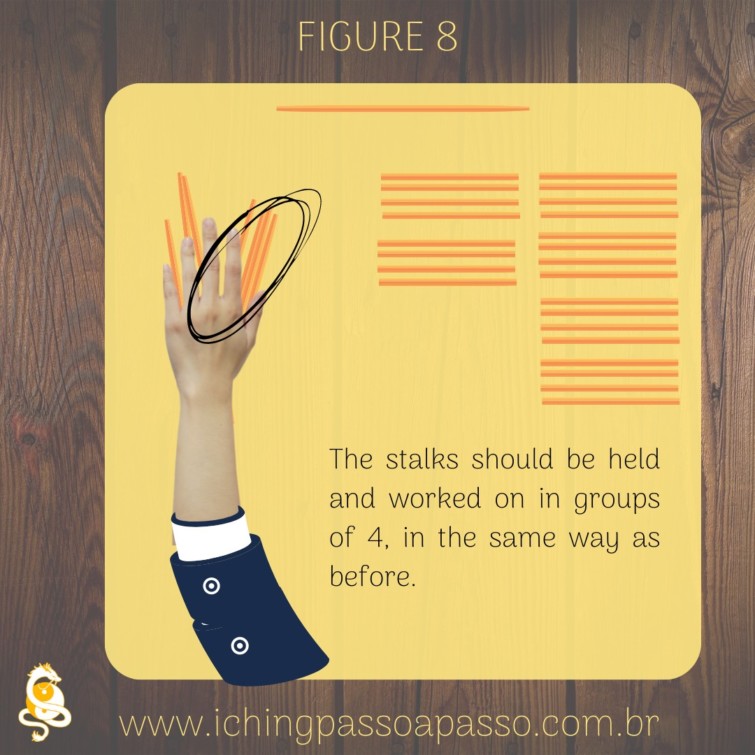
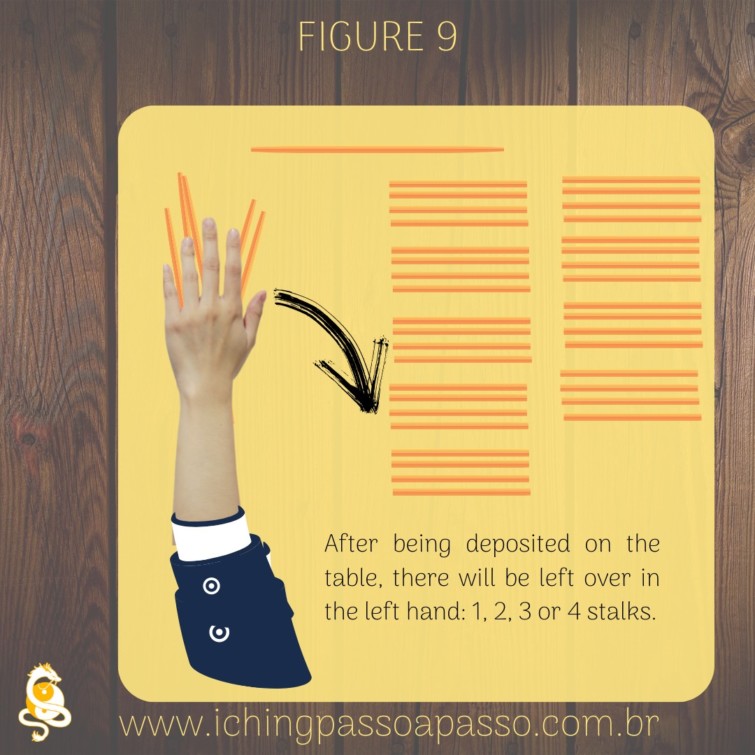
Start separating the left hand stalks group into groups of four stalks, placing them on the table. Continue the operation until one, two, three or four stalks remain.
STALKS 4 STALKS 5
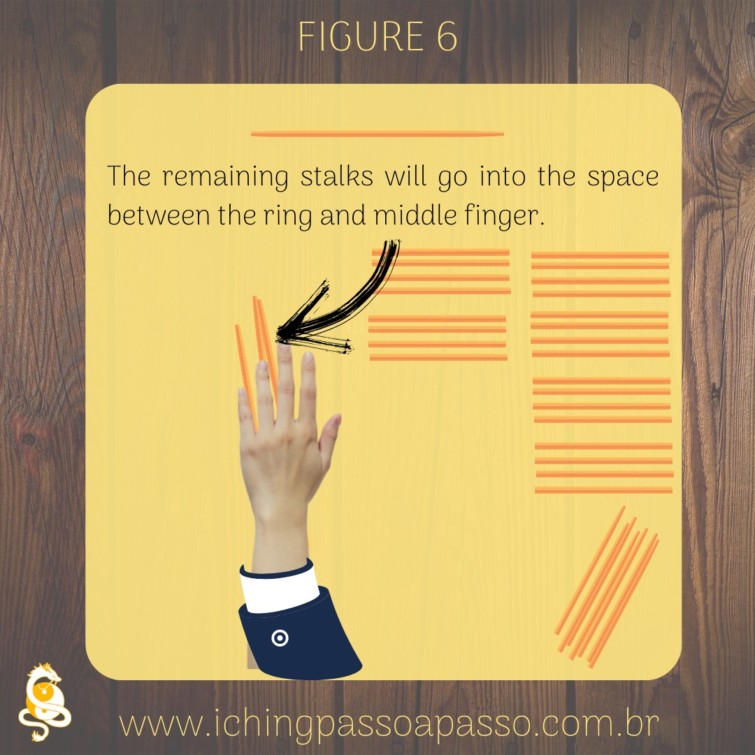
Place the remaining stalks (one, two, three or four) between your ring and middle fingers.
STALKS 6
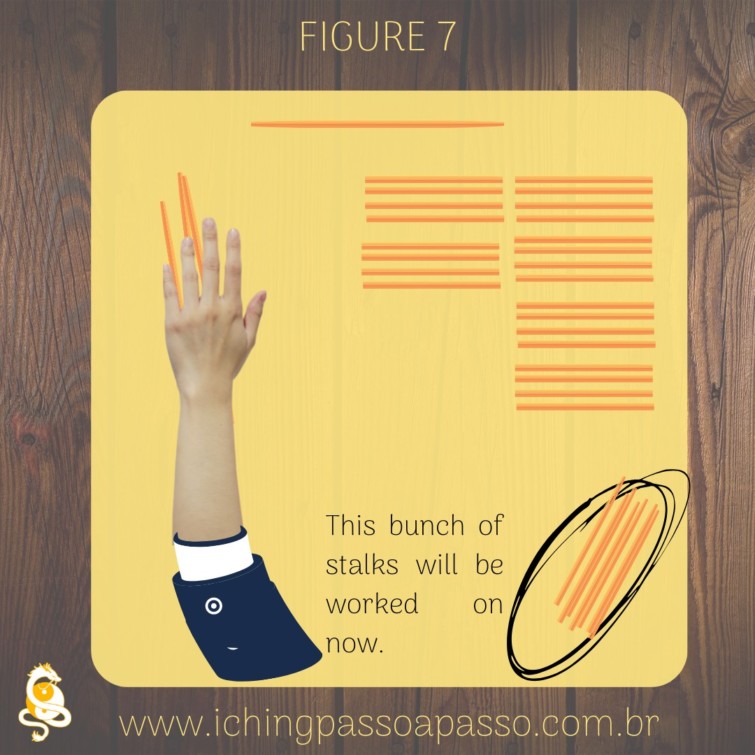
Agora pegue da mesa as varetas que ainda não foram manipuladas, coloque-as na mão esquerda entre os dedos indicador e polegar e separe este segundo grupo de varetas em grupos de quatro, colocando-os em cima da mesa dando sequência aos outros que já estavam lá – até que reste uma, duas, três ou quatro varetas.
STALKS 7 STALKS 8 STALKS 9 STALKS 9
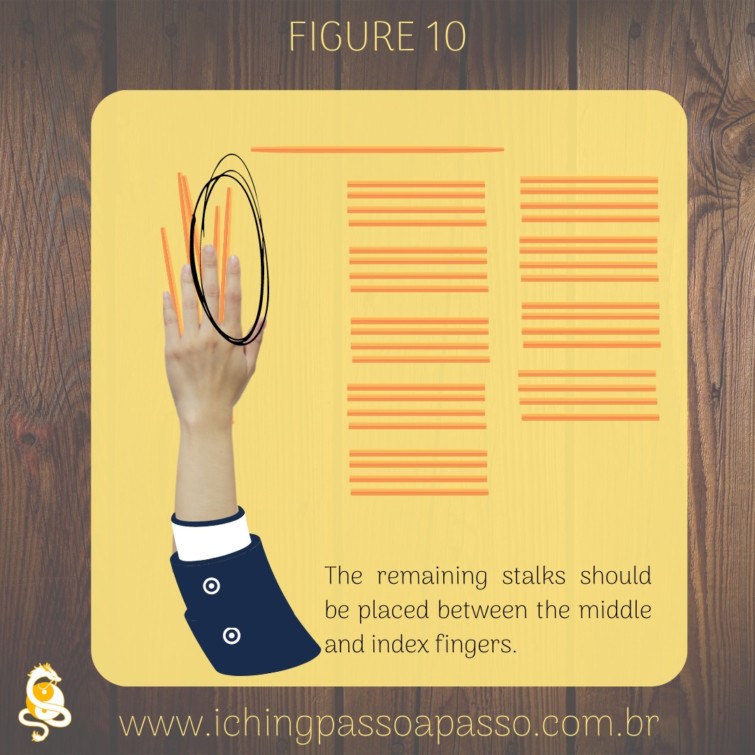
Place the remaining stalks (one, two, three or four) between your middle and index fingers.
STALKS 10
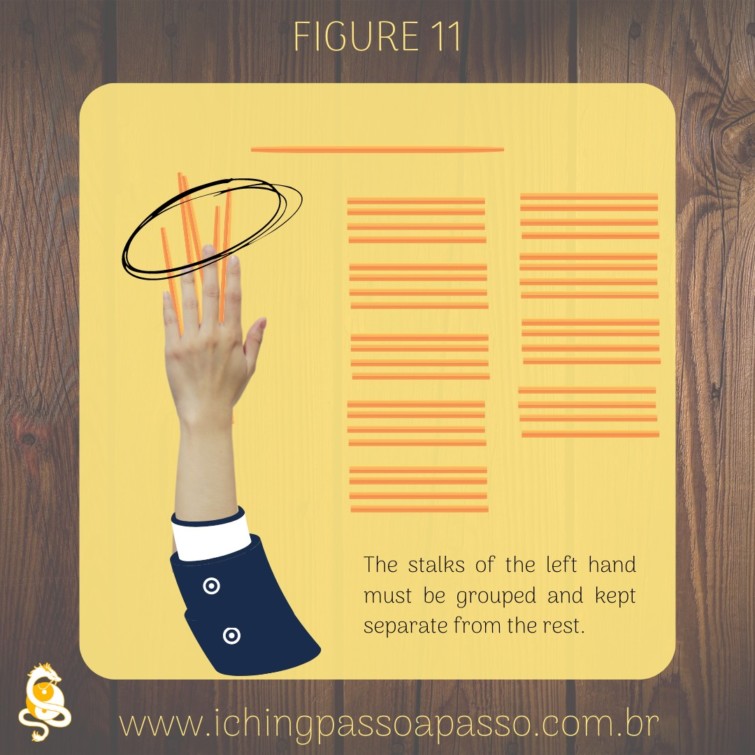
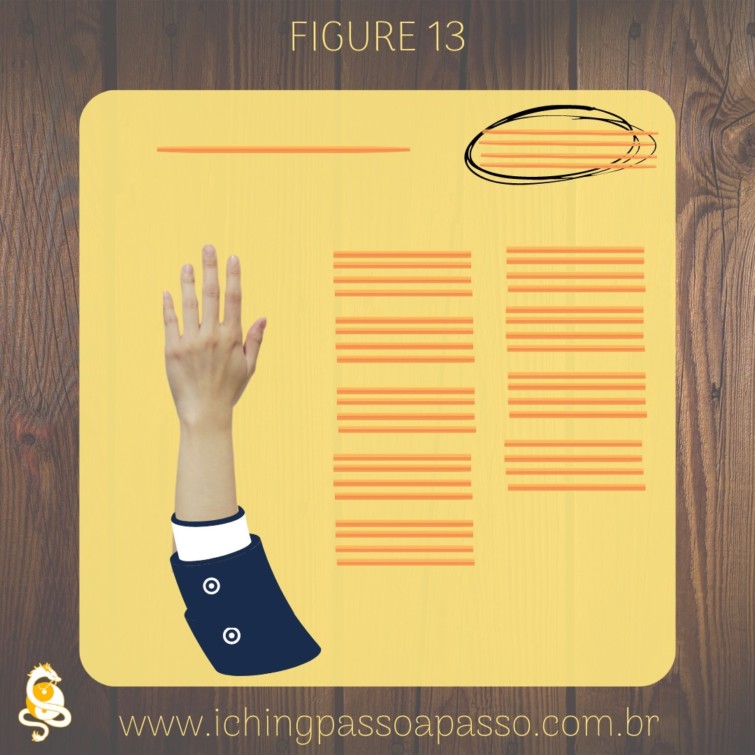
Gather up and count all the stalks that are left between your fingers. This sum can result in a value of five or nine.
OBS: Se der um resultado diferente de cinco ou nove, houve um erro nesta etapa. Este resultado deve ser desconsiderado e o processo deverá recomeçar a partir da divisão das 49 varetas.
Having the result of five or nine in the sum of the stalks that remained between your fingers, separate on the table this first result.
STALKS 11 STALKS 12 STALKS 13
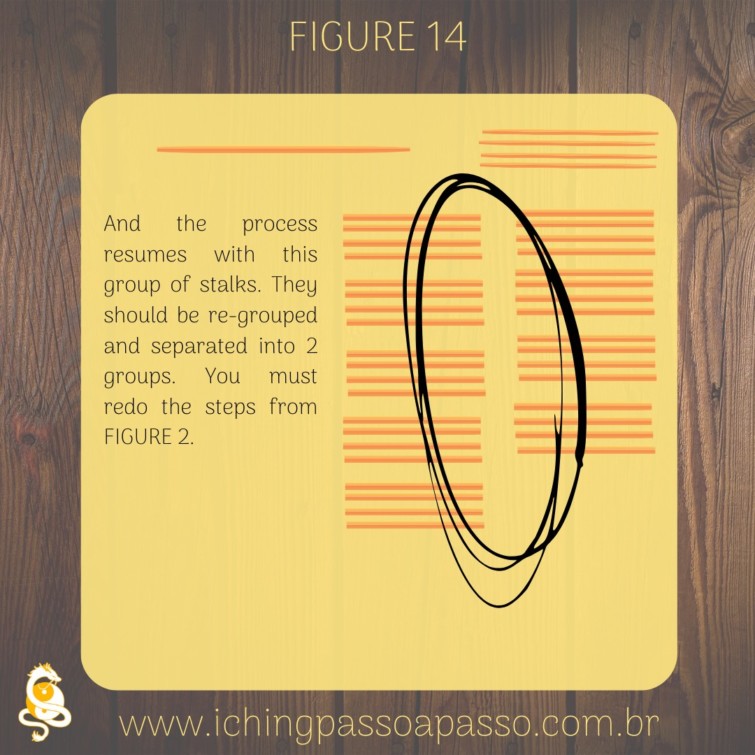
Continuing, join all the groups of four stalks that were on the table, thus forming a single set.
STALKS 14
E comece o processo novamente a partir do passo de dividir o novo grupo em dois e coloque uma vareta da mão direita entre os dedos mindinho e anelar da mão esquerda. Vou repetir algumas figuras e texto para facilitar o processo.
STALKS 2
Leave the group of stalks in your right hand resting on the table.
STALKS 3
Start separating the left hand stalks group into groups of four stalks, placing them on the table. Continue the operation until one, two, three or four stalks remain.
STALKS 4 STALKS 5
Place the remaining stalks (one, two, three or four) between your ring and middle fingers.
STALKS 6
Agora pegue da mesa as varetas que ainda não foram manipuladas, coloque-as na mão esquerda entre os dedos indicador e polegar e separe este segundo grupo de varetas em grupos de quatro, colocando-os em cima da mesa dando sequência aos outros que já estavam lá – até que reste uma, duas, três ou quatro varetas.
STALKS 7 STALKS 8 STALKS 9 STALKS 9
Place the remaining stalks (one, two, three or four) between your middle and index fingers.
STALKS 10
Add up and count all the stalks that are left between your fingers. This second sum can result in a value of four or eight.
STALKS 11
Note: If it is different from four or eight there was an error in this step and your result must be disregarded and we must start over from the step "Put all the groups of four stalks that were on the table together, thus forming a single set".
Separate on the table this second result.
STALKS
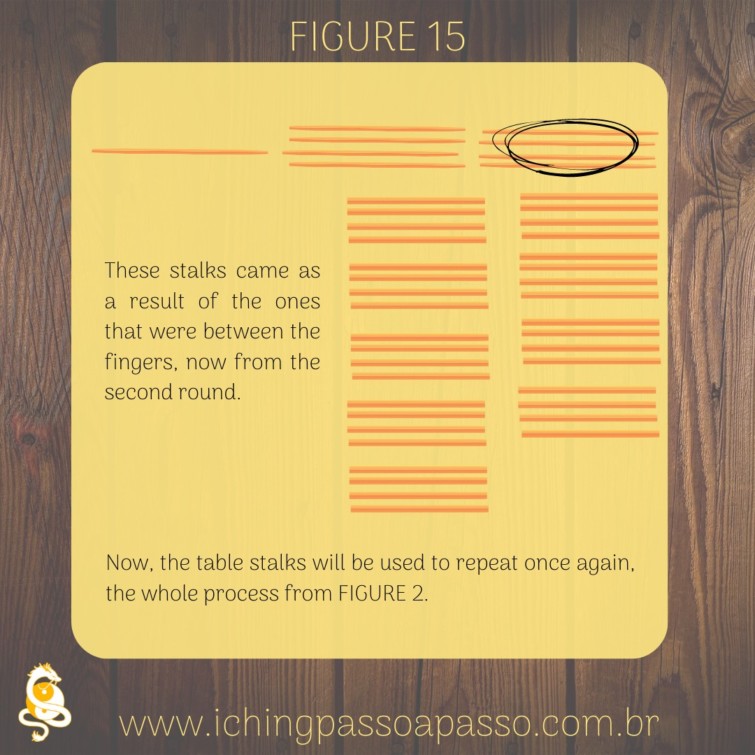
Realize that now there two results on the table, the first and second division results.
STALKS 15
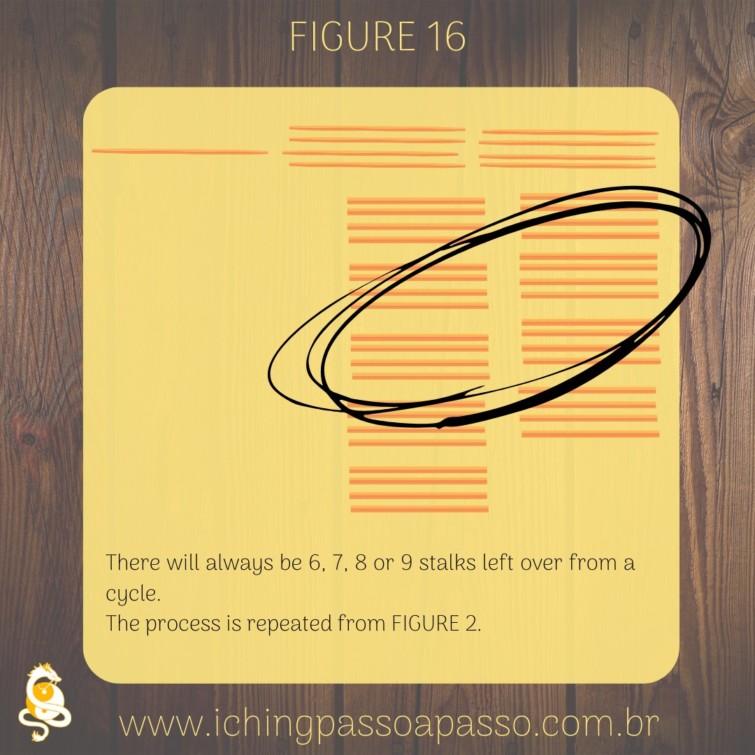
The process repeats itself one last time. I will repeat the process, photos and text, so that you, if necessary, can follow along.
Gather all the groups of four rods that were on the table thus forming a single set.
STALKS 16
Divide the new group in two and place a stalks from the right hand between the pinky and ring fingers of the left hand.
STALKS 2
Leave the group of stalks in your right hand resting on the table.
STALKS 3
Start separating the left hand stalks group into groups of four stalks, placing them on the table. Continue the operation until one, two, three or four stalks remain.
STALKS 4 STALKS 5
Place the remaining stalks (one, two, three or four) between your ring and middle fingers.
STALKS 6
Agora pegue da mesa as varetas que ainda não foram manipuladas, coloque-as na mão esquerda entre os dedos indicador e polegar e separe este segundo grupo de varetas em grupos de quatro, colocando-os em cima da mesa dando sequência aos outros que já estavam lá – até que reste uma, duas, três ou quatro varetas.
STALKS 7 STALKS 8 STALKS 9
Place the remaining stalks (one, two, three or four) between your middle and index fingers.
STALKS 10
Add up and count all the stalks that are left between your fingers. This last sum can result in the value of four or eight.
STALKS 11
Note: If it is different from four or eight there was an error in this step and your result must be disregarded and we must start over from the step "Put all the groups of four stalks that were on the table together, thus forming a single set".
Separate on the table this result.
STALKS 12
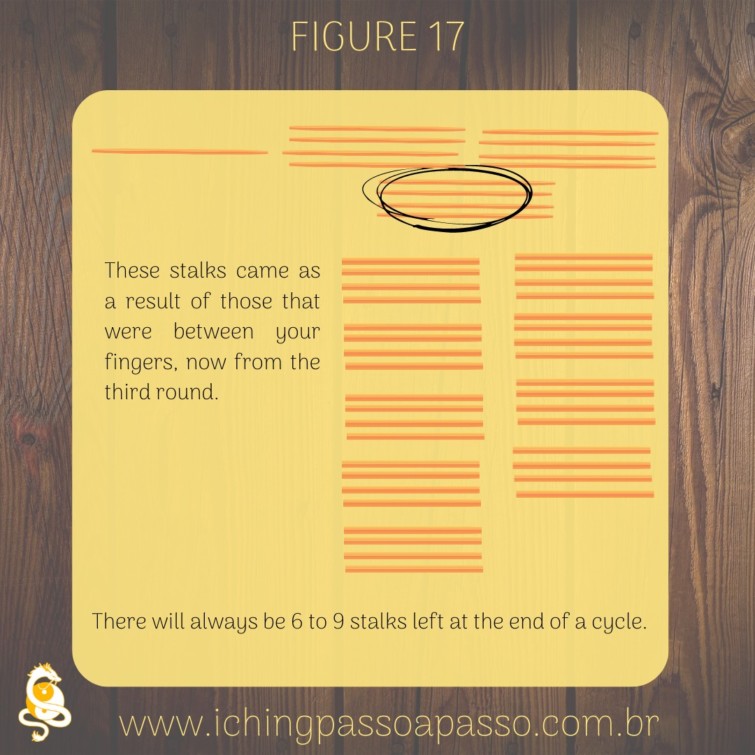
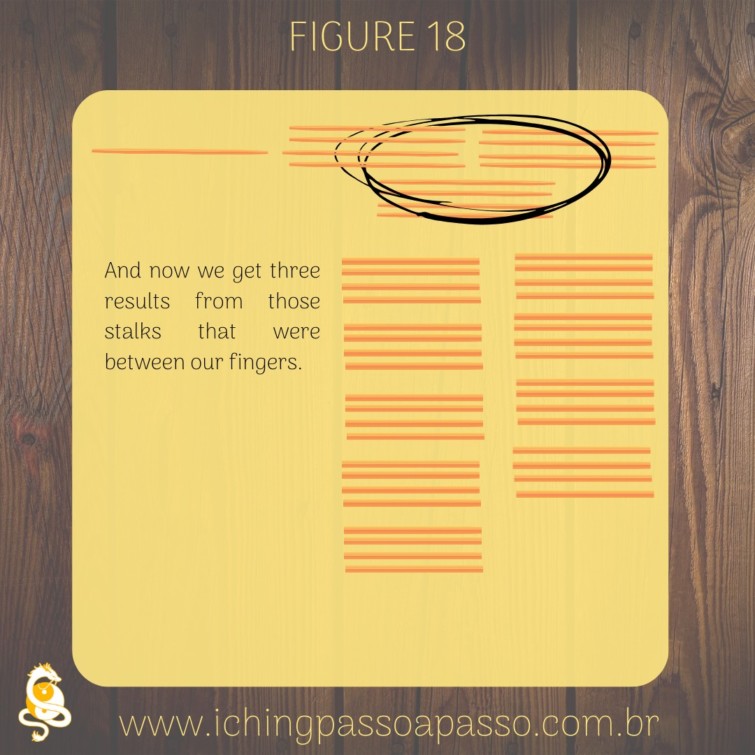
We are now left with 3 results (three sets of stalks that were between our fingers).
STALKS 17 STALKS 18
Count how many groups of 4 stalks are left on the table and write this down next to 1° (then in second, third, ... and sixth) position. The amount of stalks can vary between numbers 6, 7, 8 or 9.
6th position
5th position
4th position
3th position
2th position
1th position
To do a process conference (counterpart) we can analyze the 3 results of the stalks that were left between our fingers..
For this conference, we will adopt the value 3 for the smaller groups (with 4 or 5 stalks) and 2 for the larger groups (with 8 or 9 stalks). Again, we have the definition of the first (after second, third, ... and sixth) position.
Repeat the process from step SYNCHRONICITY START to note the result of the 2nd, 3rd, 4th, 5th and 6th positions.
Remember, this process is to increase our concentration so that we can read the answer to our question.
The next step is to discover the hexagram and to do so we should draw a broken line --- --- --- --- next to all the even results (6 or 8) and an solid line ------ next to the odd results (7 and 9).
In sequence we must mark all relevant positions, that is, the positions that have 6 or 9 as the result, even if they are all positions.
Search for the hexagram using the table at the link https://pt.wikipedia.org/wiki/Hexagramas_(I_Ching)#Tabela_dos_64_hexagramas and read: the Hexagram's Title, its Context, the Judgment, the Image, and all relevant lines (result 6 or 9).
The context of the hexagram describes the situation, the Judgment usually describes the way an ordinary man goes through the situation. The Image is usually a message of how a higher person handles the situation, and the lines describe all the possible attitudes that a person is capable of taking, be it a good attitude or a bad one.
And for you who arrived until the end of this text, feel free to contact me by Whatsapp +55 21 99395-6631 or by email marcelo@ichingpassoapasso.com.br to take some doubt of this process.
LINKS RELATED TO THIS POST

